Recently, my mom asked if I would like to have a hutch that she was planning on getting rid of. It’s a two piece hutch with a table as its base. I told her that I would take both pieces, but initially I thought I would just use the table part. I took the top just in case I changed my mind, and because I hated to separate the two pieces.
The hutch was purchased second-hand and my mom hadn’t made any changes to it. This picture doesn’t really show how yellowed the cream colored hutch had become. I’m not sure why it had yellowed, but maybe because the sealer wasn’t one of those non-yellowing polyurethanes? Not sure, but it definitely needed some help.
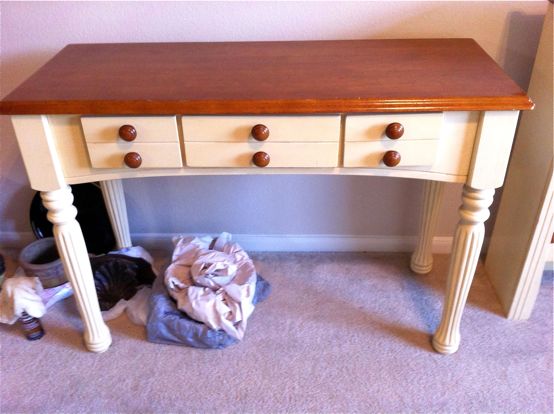
I wasn’t really a fan of the knobs, but I did originally think about painting them to save some money. In the end, I just knew I would still dislike them and they wouldn’t go with the look I was going for.
I love the look of Italian and French Country decor, so I knew I wanted something that fit along those lines.
During my online search for tutorials, I saw that several DIY bloggers were big fans of the Annie Sloan Chalk Paint and waxes for distressing furniture. I don’t really know much about it, but it’s supposed to be wonderful…and very expensive. I figured I could get the look I wanted for much less.
I came across a blogger who had “antiqued” a piece a furniture using spray paint and a wood stain. I really liked the way her piece had turned out, so I headed to Home Depot to pick up some supplies.
I also found a blog, which had a list of Annie Sloan paint color dupes. I went with Behr paint in Polished Pearl. It’s supposed to be a dupe for Annie Sloan Chalk Paint in Old White.
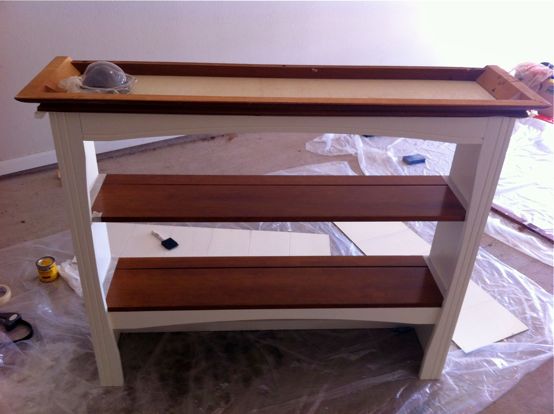
I decided to start with the table and just see how it turned out. At this point, I had decided that I was going to use it as a hutch and not just a table. I liked the color of the stain on the table top and shelves, so my plan didn’t involve changing those areas.
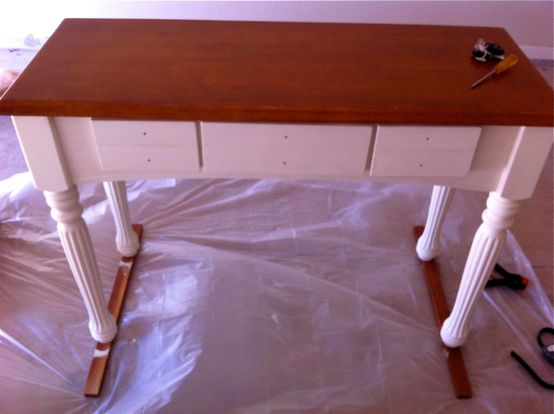
I lightly sanded the lower part of the table with a sanding sponge. This just roughs it up a little bit so the paint adheres better. The paint I used was a paint and primer in one, so I didn’t need to prime it. I’d read that flat paint would absorb too much of the stain, so the paint I used was a satin finish one. Two coats of paint later and here it is. Already looks better.
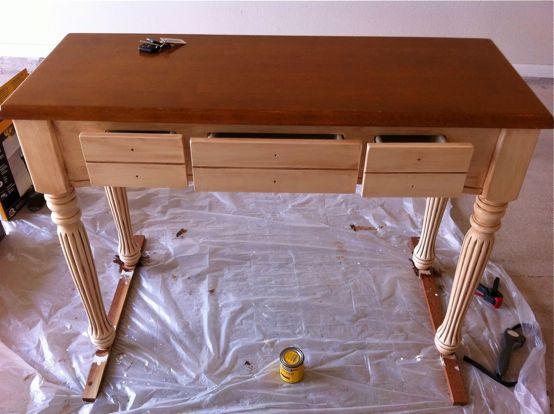
After giving the last coat of paint time to dry, it was time for the stain. I applied the stain to the table working in fairly small sections, (like one leg at a time) then wiped it off with a paper towel. I followed that up with another paper towel for a final “buffing”.
You want to leave the stain in the crevices and leave just a tint of the stain on the flat areas.
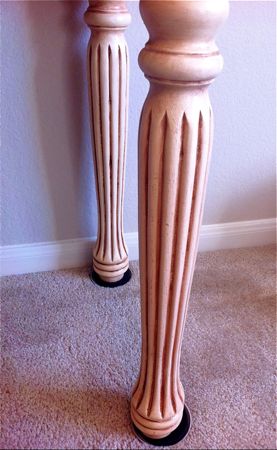
I love the way the legs look on the table.
The table was still sitting on those plastic moving men things in the photo because I hadn’t decided the exact spot to place it.
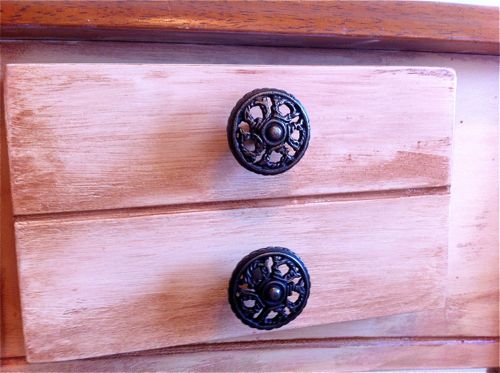
You may notice in the next picture that the fronts of the drawers look different. When I went to spray the Polyurethane sealer on the table, I noticed a few places on the middle and right drawer that looked like a tiny bit of the stain had gotten rubbed off. It’s not visible in the picture above, so it must have happened later. I really wanted to be done with the table, so I decided to just leave it the way it was. It wasn’t too bad, and I was thinking that the knobs would hide most of it. I sprayed the first coat of sealer on and let it dry.
I have a bit of an OCD problem though, so I knew it would really bug me to not try to fix it. I lightly sanded the fronts of the drawers and tried to reapply and remove the stain the way I’d done before. This time, it didn’t wipe away as cleanly. It clung to certain spots. I ended up having to do all three drawer fronts to try to get them to have a slightly more uniform look.

I wasn’t sure I like how it looked at first, but in the end, I decided that I actually liked it better. It gave it a more antique/distressed look.
I repeated the same process with the top of the hutch.
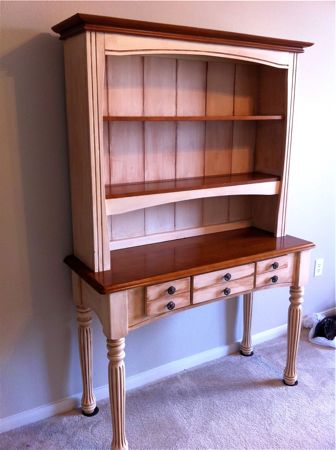
As luck would have it, Hobby Lobby had a 50% off sale on knobs last week. 🙂 I picked up six new knobs that I thought would look good.
So much better than the original ones!
It isn’t exactly like I imagined, but I really like how it turned out. Considering this was my first attempt at “antiquing” a piece of furniture, and how long it’s been since I’ve done any type of painting/staining, I don’t think I did too horribly bad. It’s not perfect by any means, but I like it and that’s what counts.
That being said, I think it may be a little while before I take on another piece of furniture that size. 😉 I do have a lot of leftover paint though, so I will definitely be looking for another small project to do!
Now, time to get busy decorating this piece! I will update this post when that is complete.
Materials used:
Sanding Sponge
Paint brush
Foam brushes (for the stain)
Behr Premium Plus Interior Satin Enamel in Polished Pearl
Minwax Stain in English Chestnut
Minwax Spray Polyurethane
Plastic drop cloth
Have you ever transformed a piece of furniture. DIY projects: love or hate them?